This posting was part of the journey to graduate from Diploma 3 Computer Engineer PCR.
After long time no single post, finally I posted something today. So many things happened that requires time, also some internal problems, also many many projects outside campus and church … I only can say sorry ![]()
There is more story in my personal Instagram.
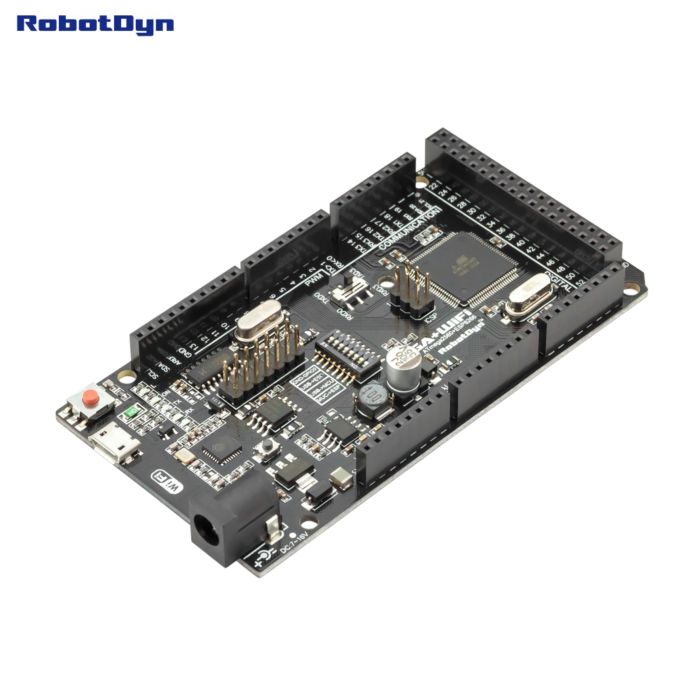
RobotDyn Mega + Wifi is an Arduino Mega compatible board, that already has an ESP8266 builtin. Imagine this, you buy an Arduino Mega, put ESP8266 in one of the serial, and you got this board. Unlike Wemos D1, this board is 100% compatible with Arduino … since this is Arduino, after all.
The problem is, the documentation of this board is somehow bad. But no problem, we’re going to work around this. We are going to learn how to program this board, as a regular Arduino Mega.
First, we’re going to need the CH341G, because this board doesn’t use ATMega16u2, like real Arduino. If you have installed it before (probably you have tinkered with Wemos D1 or another counterfeit Arduino), you don’t have to reinstall it. Otherwise, click here to download.
After installing the driver, you can see there is some dip-switch.
https://www.instagram.com/p/BnYCjzenYFu/?taken-by=rinaldojonathan
Put the switch number 1,2,3,4 to ON, and 5,6,7,8 to OFF. This way, the USB will be connected to ATmega2560 (the Arduino Mega) and not the ESP8266.
Near the switch, there is another switch, to select where the ESP8266 should be “plugged”. Just keep it at Serial3, like most of the tutorial around the net.
Done? Now try uploading Blink.
/*
  Blink

  Turns an LED on for one second, then off for one second, repeatedly.

  Most Arduinos have an on-board LED you can control. On the UNO, MEGA and ZERO
  it is attached to digital pin 13, on MKR1000 on pin 6. LED_BUILTIN is set to
  the correct LED pin independent of which board is used.
  If you want to know what pin the on-board LED is connected to on your Arduino
  model, check the Technical Specs of your board at:
  https://www.arduino.cc/en/Main/Products

  modified 8 May 2014
  by Scott Fitzgerald
  modified 2 Sep 2016
  by Arturo Guadalupi
  modified 8 Sep 2016
  by Colby Newman

  This example code is in the public domain.

  http://www.arduino.cc/en/Tutorial/Blink
*/

// the setup function runs once when you press reset or power the board
void setup() {
  // initialize digital pin LED_BUILTIN as an output.
  pinMode(LED_BUILTIN, OUTPUT);
}

// the loop function runs over and over again forever
void loop() {
  digitalWrite(LED_BUILTIN, HIGH);   // turn the LED on (HIGH is the voltage level)
  delay(1000);                       // wait for a second
  digitalWrite(LED_BUILTIN, LOW);    // turn the LED off by making the voltage LOW
  delay(1000);                       // wait for a second
}
Besok besok aja kita buat tutorial untuk Wifi nya ya. :hammers
Incoming Terms
- Robotdyn Mega Wifi Setup
- Robotdyn Mega Wifi
- Wemos Mega Esp8266 Serial3
- Robotdyn Arduino Tuto
- Robotdyn Untuk Apa


gan yang esp nya gimana cara memprogramnya?
pin 5,7 di ON kan kalau ga salah., udah lupa
Pada akhirnya. .. Jadi nggak tuh projek TA pakai mega2560nya?
ngga jadi